I remembered reading how to do this back in 1988 in an article from Roundel, the BMWCCA's magazine. After a 10 year hiatus, I started getting interested in working on the '02 again. It also helps that in those 10 years I've come to slow it down a bit and take a look at how things really work. If you have a 2002, this is not only simple — it's essential.
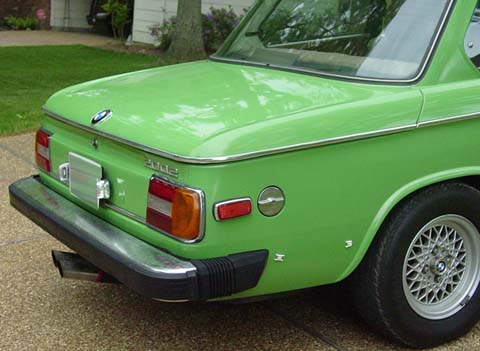
Unfortunately, the thought of taking "before" pictures did come to me, but I was inspired after a weekend of tracing grounds and running wires to just get the thing done. Seeing a before picture is as easy as looking at any 2002 with the extended bumpers and then looking at this one.

What You'll Need
- Eye protection and nose mask — non-negotiable
- Drill — 14.4v minimum, more power is better
- Self-tapping screws or bolts with driver
- Two drill bit sizes: one to tap/drain, one just larger than the screws
- Carbide tipped bits — the gold ones — to chew through metal
- Box cutter to cut the bumper ends
- Black silicone to tidy up cuts

Drain the Hydraulic Fluid
Use a larger bit first — thinking this would allow the fluid to drain more readily. What I didn't know, and wasn't mentally prepared for, was that the hydraulic fluid is under PRESSURE. Find a suitable place for a good angle on the bumper holders and start drilling. Metal bits will fly from the drill, but the biggest hazard is the fluid.
You'll know you've done well when the fluid expels with great fanfare — and mess. Once drained, the bumper should move with very little effort, held out only by the rubber holders on the side.
Slice the Rubber Ends
Use the box cutter to slice the ends near the end of the bumper. On the front, cut nearest to the bumper. On the rear, cut closer to the car — I like the way the rubber meets the edges better as a result. This allows the bumper to slide in and out freely. You can set the length at whatever you wish. Mine are set as far in as possible. Don't trim the sides yet — set the desired position first.
No photos of this step — I was too inspired to stop and take pictures. Looking at any stock 2002 gives you the "before" for free.
Lock the Bumper in Place
Once the bumper is where you want it, find a drill bit just a little smaller than your self-tapping screw. This ensures a good thread and a good hold. Front: the outer sleeve stays while the inner slides in — there's a ready-made hole to use. Rear: both sleeves slide inward, so drill through both to tap the screw in.
Once the screw is powered in — congratulations. Your bumper ain't going nowhere.
Trim the Side Bolsters
Now that the bumper is secure, you can trim the side bolsters. Some have said they just tuck the sides in — this works only if you cut on that side of the bolster. I wanted them cut to look original-ish. Eyeball the distance and cut one rib more than what you think — fudge room is valuable. Once trimmed, get out the black silicone and shape the cuts.
"Admire your work. Wash off the hydraulic fluid on your arms, neck, face, head. Kiss the wife. Get a beer. Admire your work again."